
For eight long years I missed the more-ish texture and taste of chocolate fingers. This is why I have tried and tested the perfect biscuit recipe and chocolate coating to re-create this classic chocolate snack.

This recipe is naturally gluten, oat, egg, nut and booze free. It can be easily made dairy free with a few simple ingredient swaps.

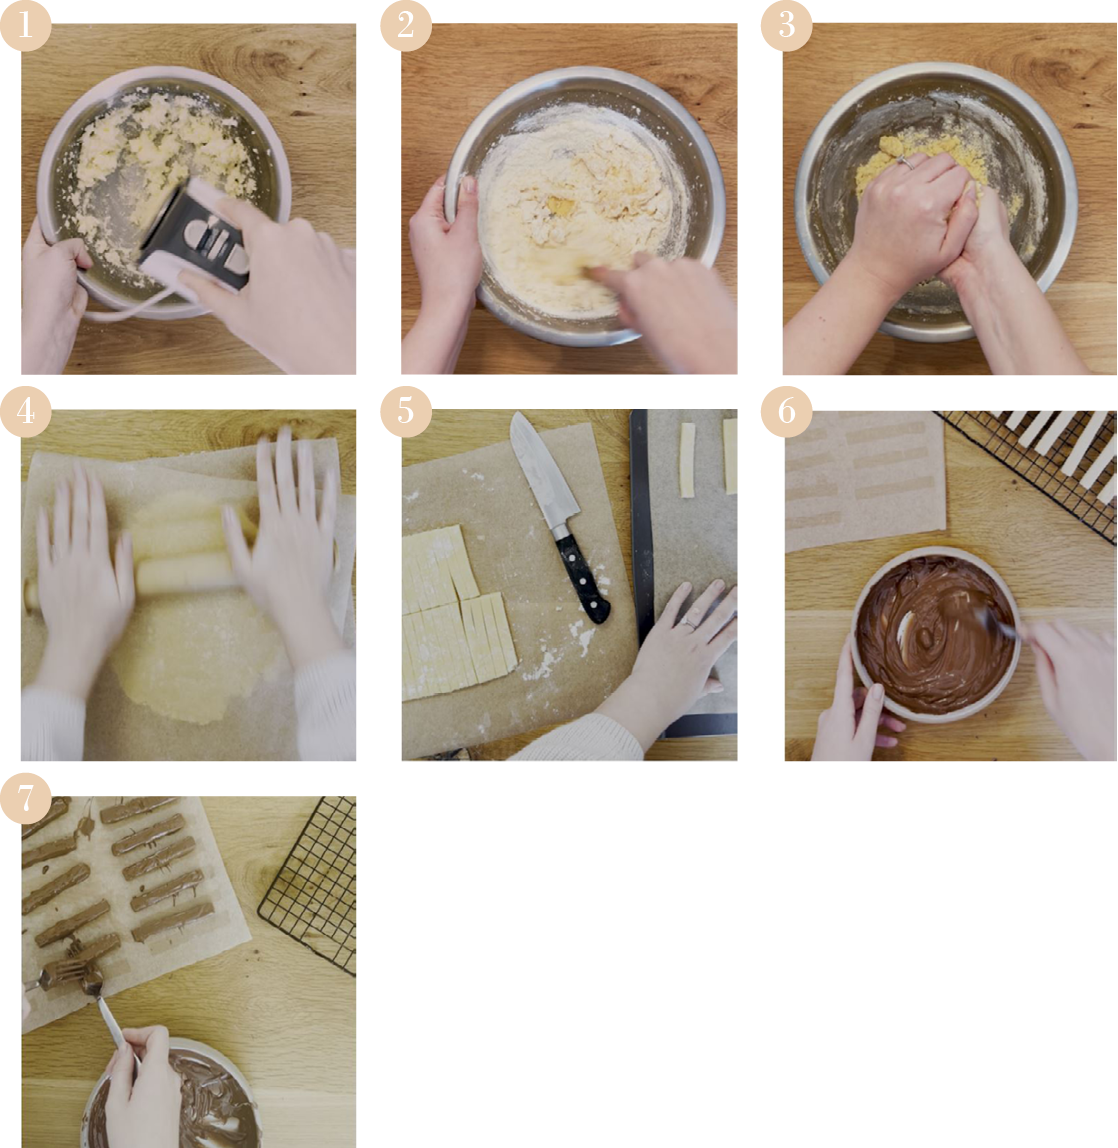
1. Cream butter and sugar with an electric whisk until fluffy and pale.
2. Combine gluten free plain flour and xanthan and add to the mixture using a large spoon or spatula.
3. Use your hands to combine the mixture into a ball of dough. The dough should be neither sticky (knead in a tbsp of flour) or crumble (add a tsp of water).
4. Sprinkle flour onto a piece of baking paper, placing the dough in the centre and another piece of baking paper on top. Now the dough is ready to roll to 3cm thickness.
5. Trim the edges of the dough to create a square shape. Cut the dough into a long rectangle, approximately 2 x 6 cm. Place each biscuit on the baking tray and place in the oven for 12 - 14 minutes.
6. While the biscuits cool, melt the chocolate in the microwave in 30 second intervals. Once melted, add a tablespoon of sunflower oil to further liquify the chocolate.
7. Place a biscuit in the bowl of melted chocolate, using two forks, cover the biscuit in its entirety until it is fully covered. Hold the covered biscuit over the bowl using a fork to drip any excess chocolate away before placing it on the baking paper to set. Repeat this until each and every biscuit is covered.
In addition to dietary requirement adjustments, there are a few easy ways to create some variation in your gluten free chocolate fingers.
Why not try white chocolate for some added sweetness? Or dark chocolate for some bitterness? Want a fruity or minty taste? Simply add one tablespoon of food flavouring to your chocolate.
These gluten free chocolate fingers are perfect to batch bake and keep for a sweet snack throughout the week or added to your little ones lunchbox. They will keep well in an airtight container for up to 5 days, left at room temperature (unless we are experiencing a heatwave!) or kept in the fridge.
Did you try this recipe? Don’t forget to rate the recipe and leave a comment below. Want more free from bakes? Join me on Instagram for more free from recipe ideas.
Line a large biscuit baking tray with baking paper and heat oven to 190c / 170c fan.
Cream butter and sugar with an electric whisk until fluffy and pale.
Combine gluten free plain flour and xanthan and add to the mixture using a large spoon or spatula.
Use your hands to combine the mixture into a ball of dough. The dough should be neither sticky (knead in a tbsp of flour) or crumble (add a tsp of water).
Sprinkle flour onto a piece of baking paper, placing the dough in the centre and another piece of baking paper on top. Now the dough is ready to roll to 3cm thickness.
Trim the edges of the dough to create a square shape. Cut the dough into a long rectangle, approximately 2 x 6 cm. Place each biscuit on the baking tray and place in the oven for 12 - 14 minutes.
While the biscuits cool, melt the chocolate in the microwave in 30 second intervals. Once melted, add a tablespoon of sunflower oil to further liquify the chocolate.
Place a biscuit in the bowl of melted chocolate, using two forks, cover the biscuit in its entirety until it is fully covered. Hold the covered biscuit over the bowl using a fork to drip any excess chocolate away before placing it on the baking paper to set. Repeat this until each and every biscuit is covered.
Place the tray of chocolate fingers in the fridges for a minimum of two hours.

In 2017 I joined the coeliac club and I knew that if I wanted to enjoy all the carby goodness I had been indulging in for 21 years, I needed to up my culinary game.
I created Lulu’s Free From to share recipes so, you too, can eat delicious food that doesn’t compromise on taste or texture and delivers on your dietary needs.